
How to Use a Tube Flaring Tool for Perfect Leak-Free Connections
How to Use a Tube Flaring Tool for Perfect Leak-Free Connections
In HVAC, refrigeration, gas delivery, and high-pressure fluid systems, a reliable connection is critical. While brazing is commonly used, it is not always the safest or most convenient solution — especially in environments where open flames are restricted.
This is where a tube flaring tool becomes essential.
A properly made flare connection creates a strong mechanical seal that can withstand pressures from 450 to 3000 psi, making it the preferred solution for soft copper and aluminum tubing installations.
What Is a Tube Flaring Tool?
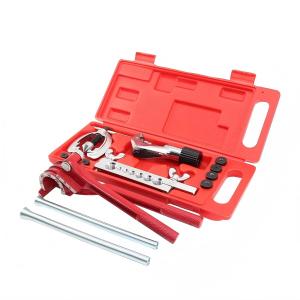
A tube flaring tool is designed to form a 45° precision flare at the end of tubing, allowing it to connect securely with flare fittings.
It typically consists of:
-
A flaring bar with multiple hole sizes
-
A hardened steel flaring cone
-
A yoke with a compression screw
This simple structure allows technicians to create consistent, leak-free flares in the field.
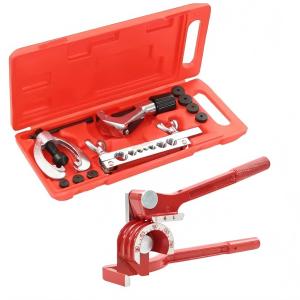
45° vs 37° Flaring – Choosing the Correct Standard
This is a common mistake in many markets.
-
45° flaring tools---HVAC & refrigeration systems
-
37° flaring tools ---automotive & industrial hydraulic systems
Using the wrong angle will result in connection failure and refrigerant leakage.
Step-by-Step: How to Flare Copper Tubing
Step 1 – Cut the Tube Properly
Always use a professional tube cutter.
A clean, square cut ensures the flare forms evenly.
Step 2 – Deburr the Tube
Remove internal and external burrs to prevent:
-
Cracked flares
-
Uneven sealing surfaces
Step 3 – Slide the Flare Nut On First
This is a classic field mistake --and it means starting over.
Step 4 – Clamp the Tube in the Flaring Bar
The tube should sit flush with the bar surface (or slightly above depending on technician preference).
Step 5 – Form the Flare
Align the cone and rotate the handle until resistance is fully reached.
Do not over-tighten.
How to Inspect a Perfect Flare
A high-quality flare should be:
-
Smooth and crack-free
-
Evenly shaped
-
Fully seated against the fitting
-
Not touching the threads
If the tube slips during flaring, simply cut and redo.
Common Flaring Problems and Solutions
Leakage After Installation
Cause:
-
Uneven flare
-
Scratched sealing surface
-
Wrong flaring angle
Cracked Flare
Cause:
-
Hard copper tubing not annealed
-
Over-compression
Pro Tips from HVAC Professionals
- Never use seal tape on flare threads
- A drop of refrigeration oil improves tightening
- Always perform a leak test
These small details make a big difference in system reliability.
Choosing the Right Flaring Tool for Your Market
For distributors, importers, and HVAC tool brands, the key selection factors are:
-
Flaring accuracy
-
Durability of the cone
-
Smooth compression mechanism
-
Multi-size compatibility
-
Ergonomic design
OEM Tube Flaring Tool Manufacturer for Global Brands
As a professional refrigeration tool OEM manufacturer, we support:
-
Private label production
-
Custom packaging
-
Market-specific configurations
-
Stable bulk supply
Our flaring tools are designed for:
-
HVAC installation companies
-
Refrigeration service contractors
-
Tool distributors
-
Brand owners
Looking for a Reliable Flaring Tool Supplier?
Whether you are developing your own tool brand or sourcing for wholesale distribution, choosing a factory with real production experience ensures:
-
Consistent quality
-
Competitive pricing
-
Fast delivery
-
Long-term cooperation
Contact us today to get:
-
Product catalog
-
OEM solution
-
Free sample evaluation
 Sourcing Auto Brake Line Flaring Kits: A Guide for B2B Distributors
 Source Reliable Flaring Tools: Prevent HVAC Leaks & Boost Margins
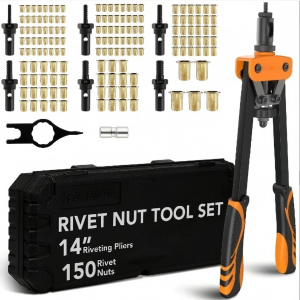 Sourcing Heavy-Duty Rivet Nut Tools: A B2B Buyer's Guide
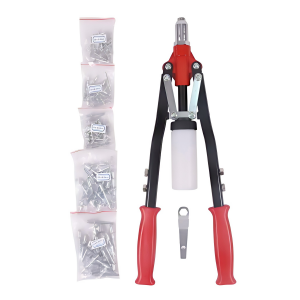 Sourcing Heavy-Duty Hand Rivet Nut Tools: A B2B Buyer's Guide