Pipe Flaring Tool Guide: Step-by-Step Instructions for HVAC Copper Tube Flaring Tool (No Leaks, No Guesswork)
Pipe Flaring Tool Guide: Step-by-Step Instructions for HVAC Copper Tube Flaring Tool (No Leaks, No Guesswork)
At our refrigeration tools OEM factory, we produce hundreds of pipe flaring tools every week. Most customers tell us the same thing: welding joints is risky and slow, especially with refrigerant, gas, or oil lines. The only real alternative that actually works is a flaring joint – a rock-solid mechanical connection that handles 450-3000 psi depending on the tubing material.
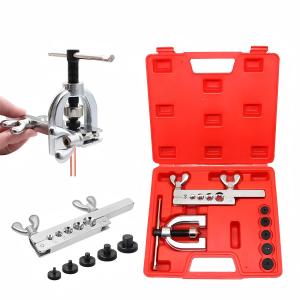
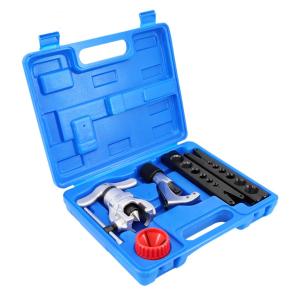
Our copper tube flaring tool (the classic yoke-style kit you see in the photo) makes perfect 45° flares every time. Here’s the exact process we train our own technicians on – simple, no fancy tools needed, and zero guesswork.
Why 45° and Not 37.5°? Don’t Mix Them Up HVAC and refrigeration use 45° flares. Automotive brake lines use 37.5°. Grab the wrong one and the fitting won’t seat. All our OEM kits come with the correct 45° cone for copper and aluminum tubing.
3 Must-Do Prep Steps Before You Start
- Cut the copper or aluminum tube square with a proper tubing cutter – hacksaws leave burrs that crack during flaring.
- Deburr inside and outside with a deburring tool or fine sandpaper. Clean is everything.
- Slide the flare nut onto the tube first (tapered end facing away from the end you’re flaring). Sounds obvious, but we see this mistake every single week.
How to Use a Pipe Flaring Tool – Full 11-Step Process Our most popular kit has the flaring bar (with different size holes), yoke, and cone. Here’s exactly how to get a perfect flare:
- Choose the right hole in the flaring bar and insert the tube until it’s flush or sticks out 1-2 mm max.
- Tighten the butterfly nut closest to the tube first, then the far one. The tube must not move at all.
- Hook the yoke onto the bottom of the flaring bar.
- Align the cone exactly over the tube end.
- Turn the handle slowly until the cone is fully seated and you can’t turn it anymore. Steady pressure beats brute force.
- Back the cone out, remove the yoke, and take out the tube.
The flare should look smooth, even, and crack-free.
Quick Check & Final Installation Test-fit the flare against the fitting body – it should seat perfectly without touching the threads. Add one drop of thread oil (never Teflon tape or sealant), hand-tighten, then torque properly. Always pressure-test for leaks, especially on gas or oil lines.
Common Problems and Real Fixes (From Our Factory Floor)
- Flare is lopsided or cracked? → Tube slipped in the bar (butterfly nuts weren’t tight enough).
- Flare won’t form? → Hard copper wasn’t annealed first, or you used the wrong angle tool.
- Cone gets stuck? → Too much force or dirty tube end.
Pro Tip from the OEM Factory Hard copper can be flared, but it must be annealed first – that’s a skill that takes practice. If you’re not confident, send it to us. We also offer full OEM customization: your logo, custom sizes, metric + imperial holes, private label packaging, and bulk wholesale.
Need a sample kit to test? Or looking for a reliable refrigeration flaring tool manufacturer for your brand? Just drop us a message below with “OEM Flaring Tool Quote” and we’ll send you pricing and options within 24 hours.
Got a flaring question? Drop it in the comments – our engineers actually read and reply. Whether you’re an HVAC contractor, wholesaler, or equipment manufacturer, we’re here to help you get perfect flares every time.
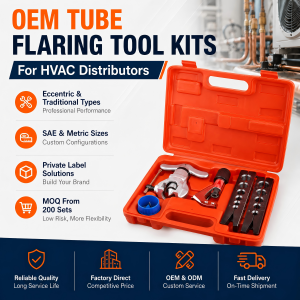 Wholesale OEM Tube Flaring Tool Kits for HVAC Distributors | Small MOQ & Private Label Solutions
 How Small Auto Repair Shops Can Save $2,000+ Per Year Using the Right 8-Piece Brake Line Flaring Tool Kit
 Best 8-Piece Brake Line Flaring Tool Kit for Small Auto Repair Shops 2026 – Wholesale Guide
 Why Small Businesses Choose LongRun as Their Manual Tube Expander Wholesale Partner