
Drain Snake Stuck in P-Trap? How to Navigate Pipe Bends
Why Your Drain Snake Won’t Go Past the P-Trap (And How to Actually Fix It)
You’ve got a clogged sink. You grab your handheld drum auger, feed the cable down the drain, and suddenly—it hits a wall.
You push harder. The cable starts bending and coiling outside the drain, but it refuses to go any further down the pipe. It feels like you’ve hit solid rock, but you haven't. You’ve just met the P-trap.
Wrestling with a drain snake is frustrating, but forcing it usually results in a kinked cable or a damaged pipe. If your auger is stuck at the first bend, here is what is actually happening underground, and the technique you need to get past it.
The Physics of the P-Trap
Look under your sink. That U-shaped bend is the P-trap. Its job is to hold a small amount of water to prevent nasty sewer gases from rising into your bathroom or kitchen.
But those sharp, immediate curves are exactly what makes feeding a 1/4-inch steel cable so difficult. When the bulbous spring-head of your auger hits the bottom of that curve, the tip is pointing directly at the pipe wall, not down the pipe.
When you push straight down, the cable has nowhere to go. So, it simply folds back on itself inside the drum or bends in your hands.
How to Turn the Corner (The Right Technique)
You don't need a heavy-duty motorized machine for a standard bathroom clog. A manual drum auger is perfectly capable of navigating a P-trap, but it requires torque, not just pushing power.
Try this exact sequence:
1. Close the Gap (The Most Common Mistake)
Do not pull two feet of cable out of the drum and try to shove it down. Keep the nose of your auger housing very close to the drain opening—no more than 2 to 3 inches away. This prevents the exposed cable from bending and forces all your energy directly into the pipe.
2. Tighten and Twist
Once you feel the tip hit the bottom of the P-trap, stop pushing. Tighten the thumbscrew (or lock the chuck) so the cable is securely gripped. Now, start rotating the drum using the handle.
3. Let the Spring Work
As you turn the drum, the coiled spring head at the end of the cable will catch the side of the pipe and literally "corkscrew" its way around the bend. Apply very light downward pressure while turning. You will feel a distinct pop or release of tension when the head clears the curve.
4. The Reverse Pull
If it’s still stubbornly stuck, pull the auger back about half an inch, turn the drum clockwise, and slowly push forward again. Changing the angle of the head by just a few degrees is usually enough to bypass the lip of the trap.
A Quick Word on Tool Grip and Maintenance
Working a cable through stubborn plumbing requires leverage. If your hands are wet or greasy, turning the drum smoothly becomes a nightmare. This is why you'll see a lot of modern augers designed with heavy-duty pistol grips and rubberized textures—it allows you to maintain stable, one-handed pressure while your other hand works the drum.
And a final tip from the trade: Never put a wet cable back in the drum.
When the job is done, pull the cable out, wipe it down with a rag, and apply a light coat of WD-40 or machine oil before feeding it back into the housing. Rust is the enemy of a smooth-feeding cable. A rusty cable loses its flexibility and is far more likely to snap inside your pipes next time you use it.
Have you ever gotten a cable completely stuck in a drain? What kind of pipe were you working on? Drop a comment below—sometimes a minor tweak in technique is all it takes to get things moving.
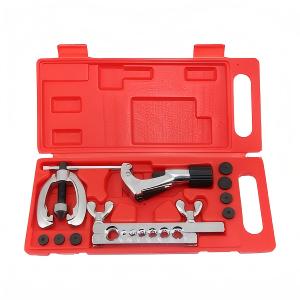 If Every Flaring Tool is Aluminum Now, How Do You Choose a Reliable OEM Supplier?
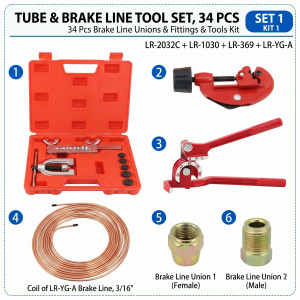 Stop the Parts Run: Why Distributors Need the Complete 34-Piece Brake Line Replacement Kit
 Why Material Matters: Sourcing Cr-V Copper Flaring Tools for HVAC Distributors